How to Fix Apex Legends Blurry Picture Quality?
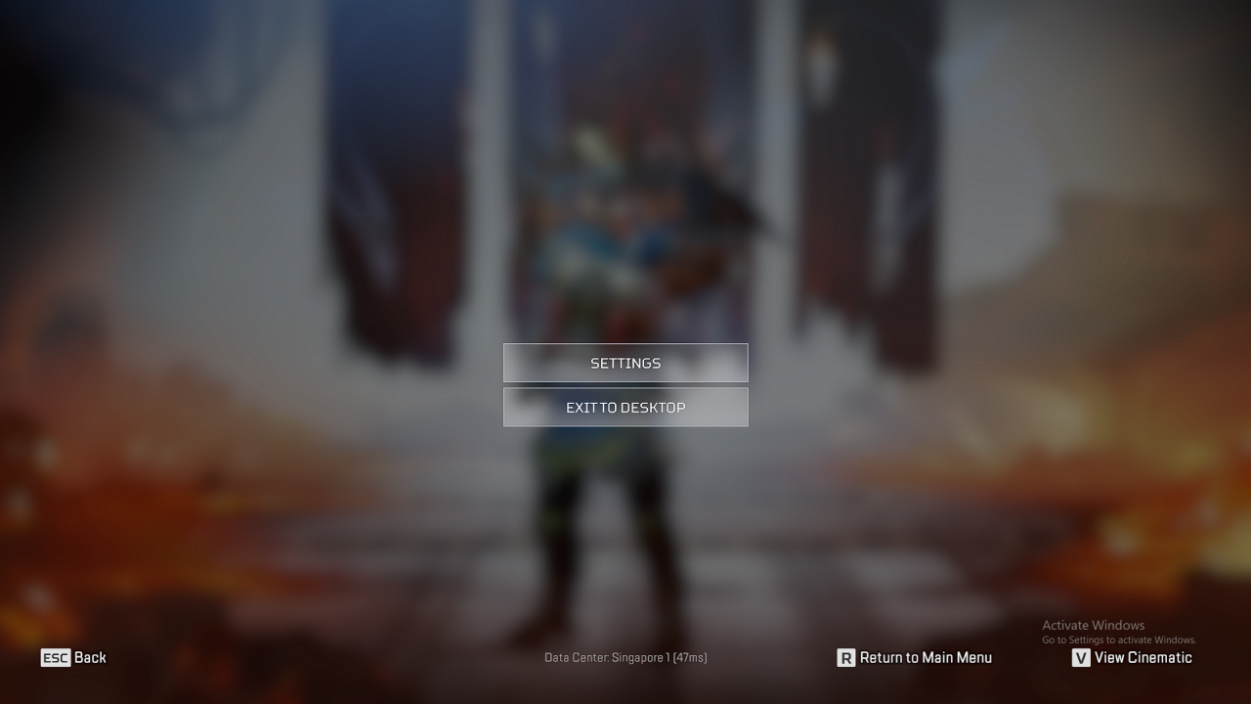
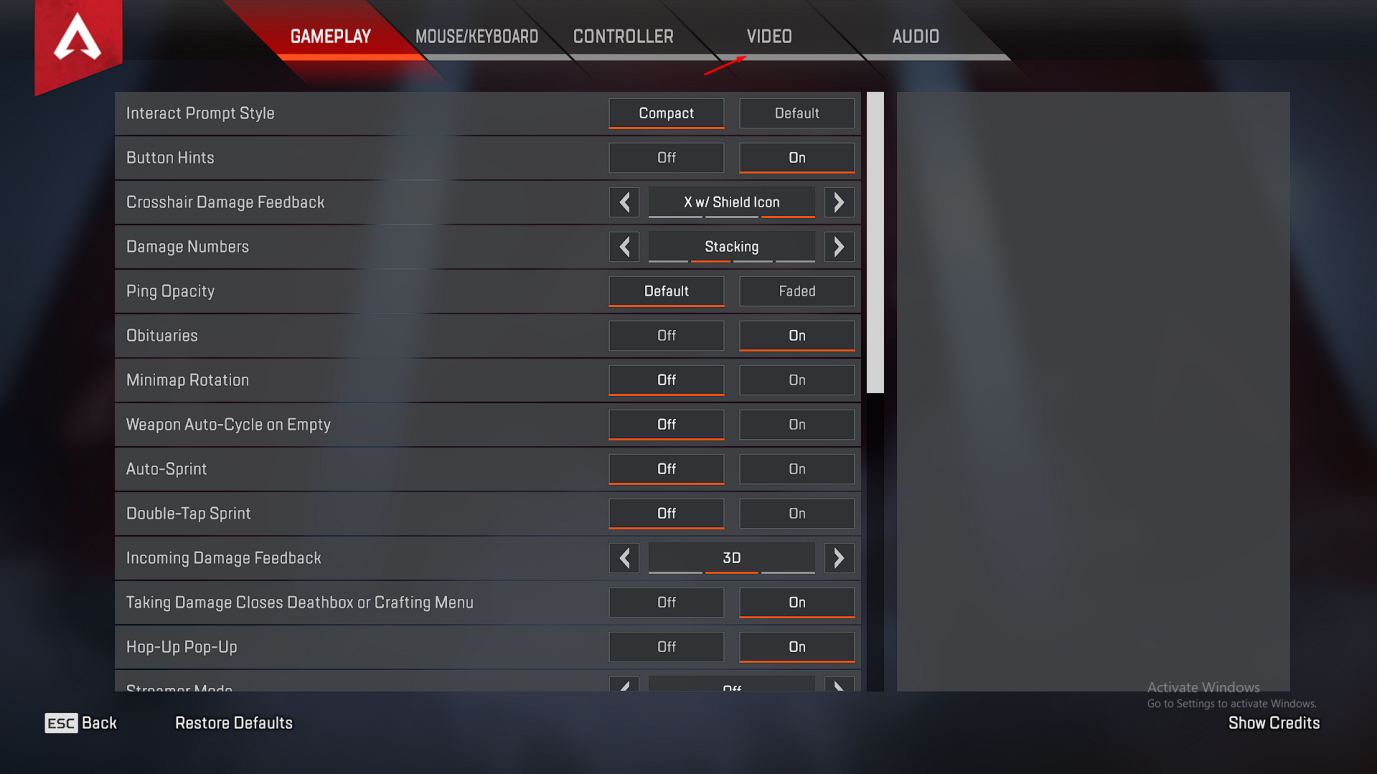
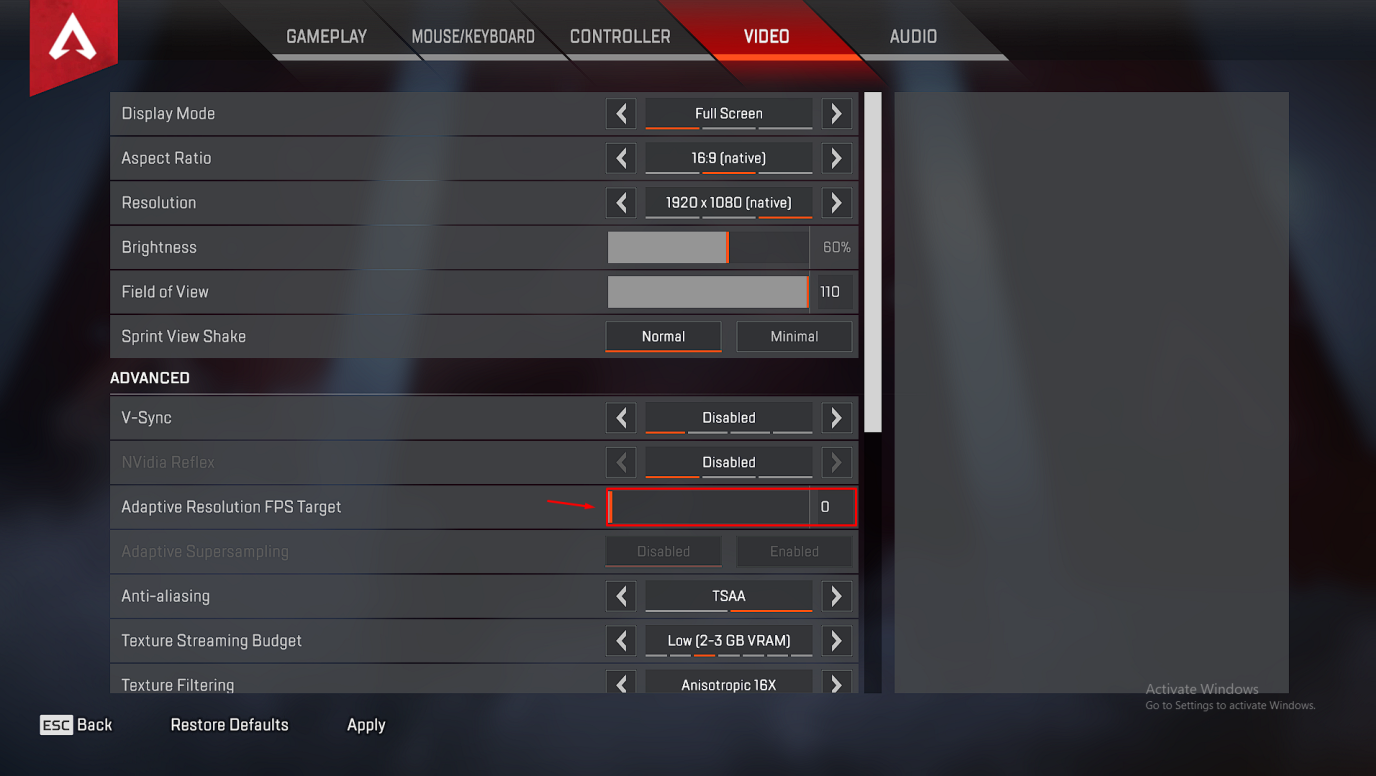
Respawn is the game developer, who brought advanced options for the players. There are plenty of options in the advanced video settings and one of them is “Adaptive Resolution FPS Target”. Follow our lead to fix the blurry problem in Apex Legends on Windows & consoles. Step 1: Open AL game. Step 2: Press ESC button. Step 3: Choose “Settings” to continue.
Step 4: Now, choose “Video” from the top menu to reveal advanced settings.
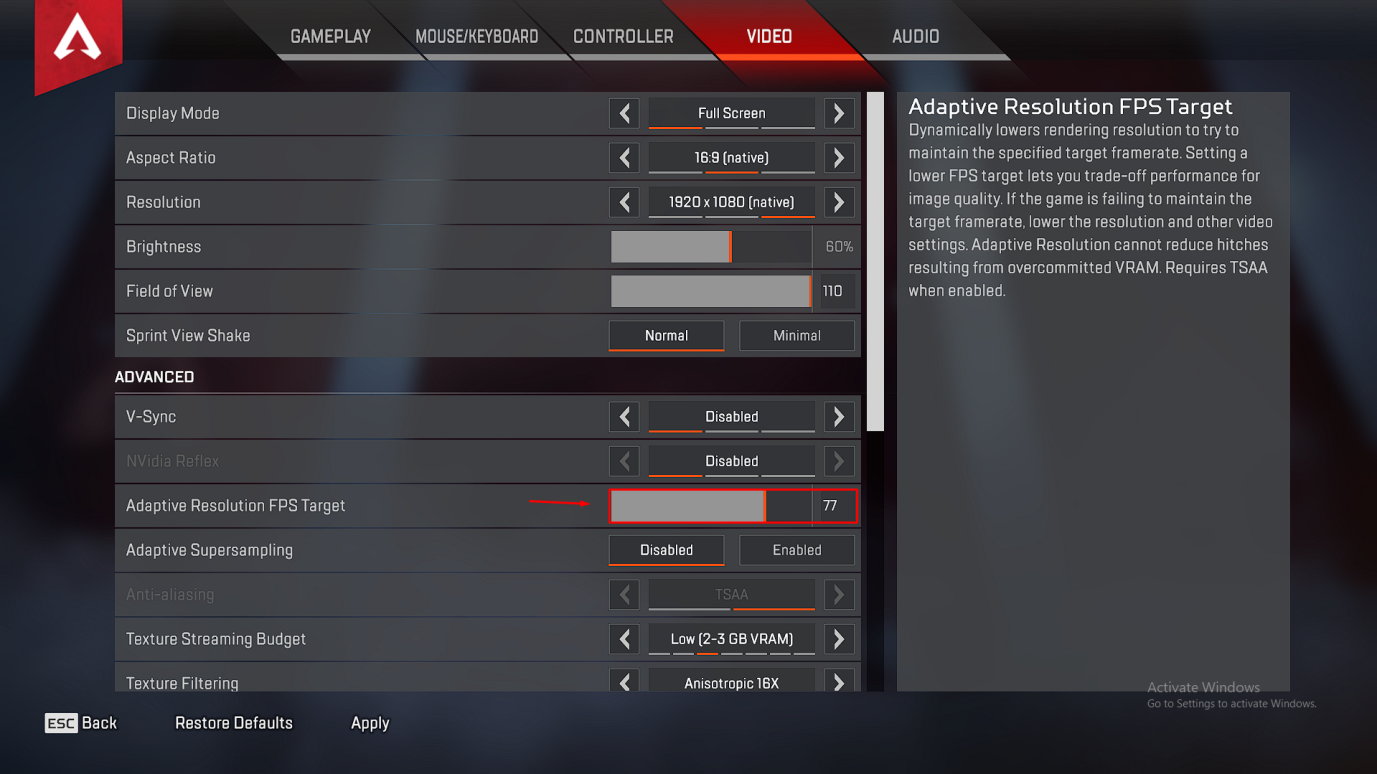
Step 5: Now, drag the “Adaptive Resolution FPS Target” to the left side.
Step 6: The “Adaptive Resolution FPS Target” should be zero.
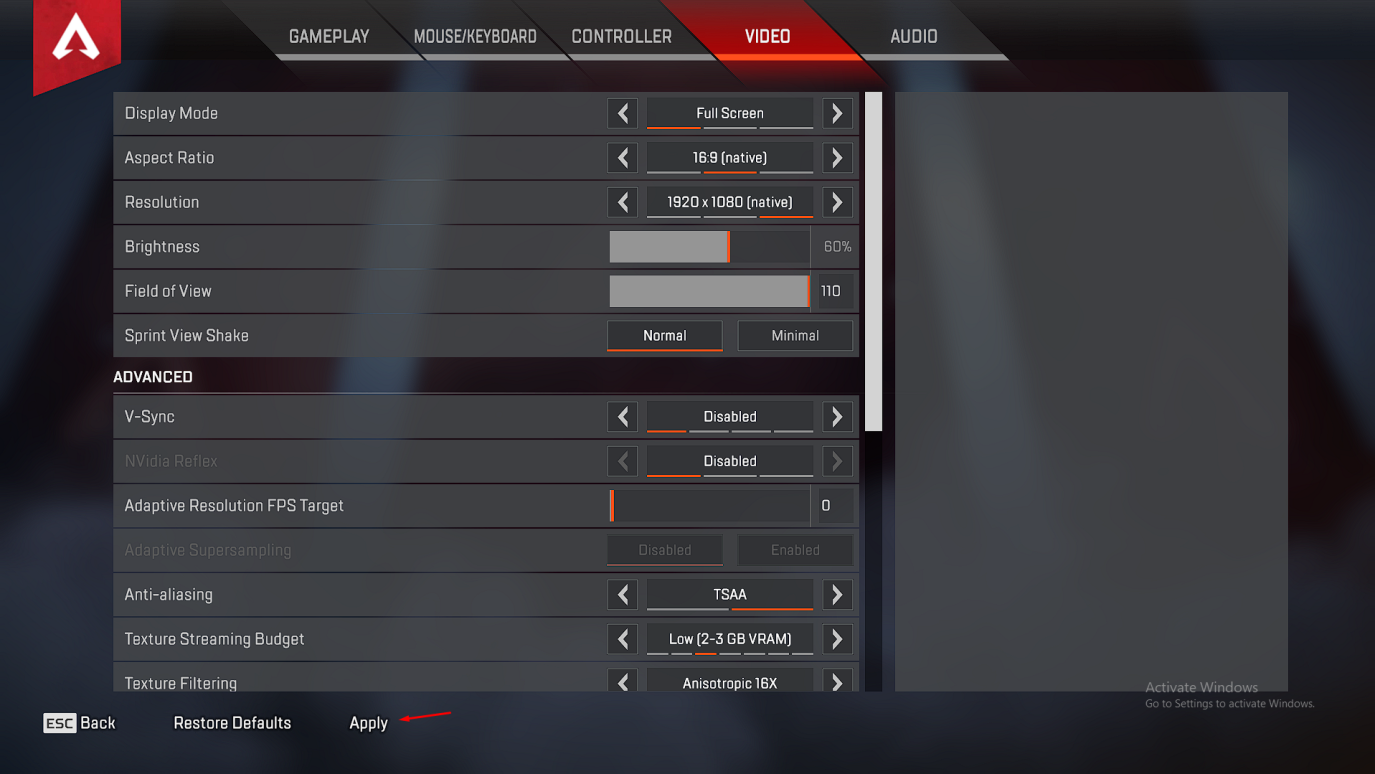
Step 7: Click on the “Apply” button located at the bottom.
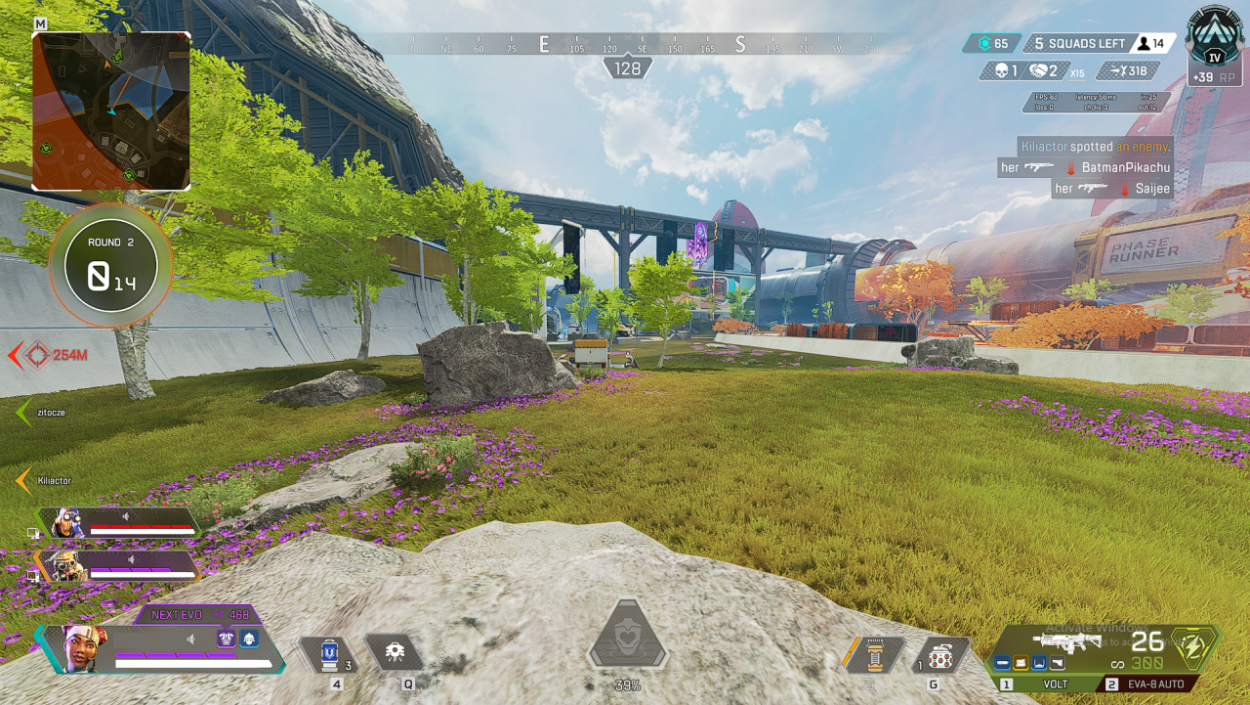
Close the game and restart the machine to apply the new changes. The developers added eye-catching elements like a waterfall, grass, industrial buildings, etc. Many budget-oriented and mid-range GPUs struggle to maintain 60 fps in Olympus map. The “Adaptive Resolution FPS Target” is designed for low-end machines, who don’t have powerful GPU. The advanced video setting targets selected FPS in all scenarios, which leads to deteriorating picture quality.
How to Maintain 60fps in Apex Legends after the Changes?
The FPS target function is no longer in effect, so your PC may have complications to maintain 60 fps throughout the round. Allow us to share the best video settings to hit 60 fps in all scenarios and it has worked on our GPU RX 570. Display Mode: Fullscreen Aspect Ratio: Native Resolution: Select native resolution or loIr it down to 720p, if your gaming rig has a low-end GPU. Brightness: It’s your preference. Field of view: Players can choose 110 FOV but if your PC has a low-end GPU, then choose 90 FOV. Sprint View Shake: Minimal Nvidia Reflex: Disable it Adaptive Resolution FPS Target: 0 Adaptive Super Sampling: Disabled Anti-aliasing: None or TSAA (if your GPU can handle it) Texture Streaming Budget: 2GB – 3GB is more than enough Texture Filtering: Bilinear Ambient Occlusion Quality: Disabled Sun Shadow Coverage: Low Spot Shadow Detail: Low Volumetric Lightning: Disabled Dynamic Spot Shadows: Disabled Model Detail: High Effects Detail: Low Impact Marks: Disabled Ragdolls: Low You should maintain the settings that I have shown above to get maximum FPS without loosing picture quality. I recommend AL video settings for competitive players, who own a laptop and equipped with mediocre GPU.
RX 570 (4GB) was having problems maintaining 60 fps in greenery regions in the Olympus map. However, the video settings that are listed above have changed the result and now I am no longer witnessing frame drops anymore.
Choose High-Performance Energy Settings
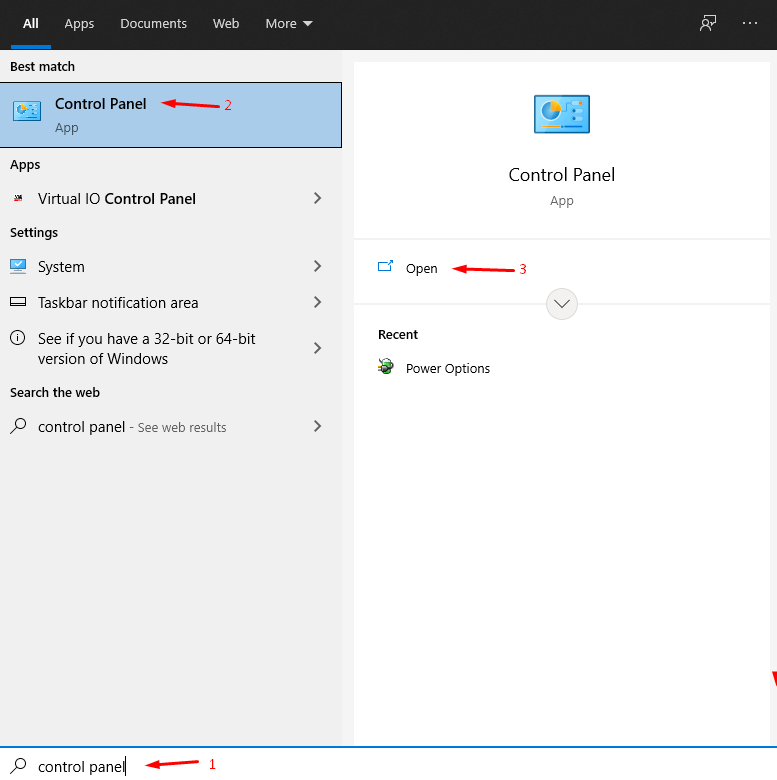
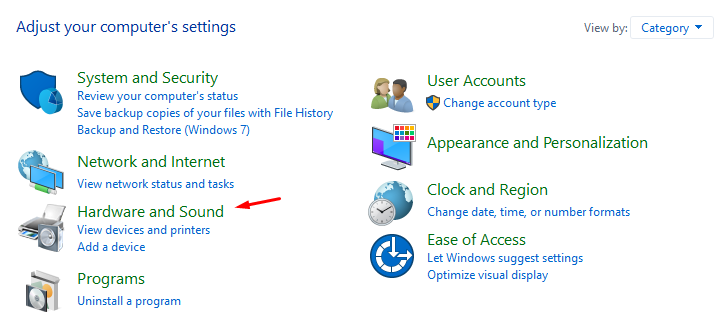
Many players don’t know that Windows software has energy plans in desktop & laptop variants. You should push the energy option to the highest available option to ensure that you are pushing the GPU to its limit. Step 1: Press Windows Key + S and open “Control Panel” to start the process.
Step 2: Choose “Hardware and Sound” from Control Panel.
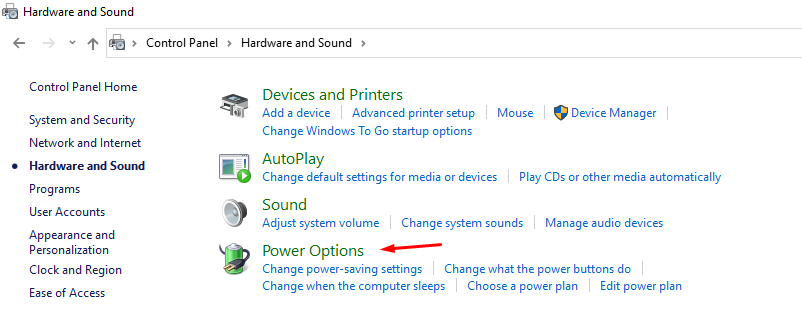
Step 3: Choose “Power Options” to continue.
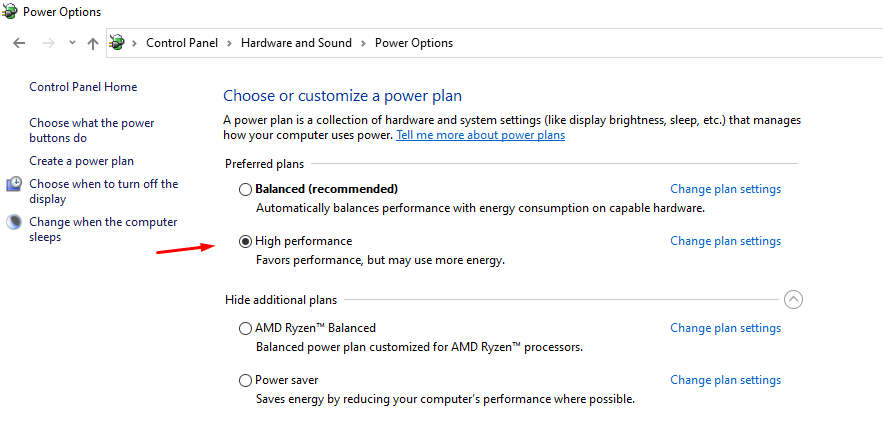
Step 4: Choose “High performance” to confirm the changes.
Gaming laptop users should keep in mind that this setting will consume a higher amount of energy when the CPU & GPU demands it. You should always connect the portable gaming laptop to the charging block to ensure that it won’t run out of battery charge. You can always tone down the setting back to “Balanced”, when not gaming because it will optimize the battery usage.
How to Improve Apex Legends Picture Quality in Nvidia Control Panel?
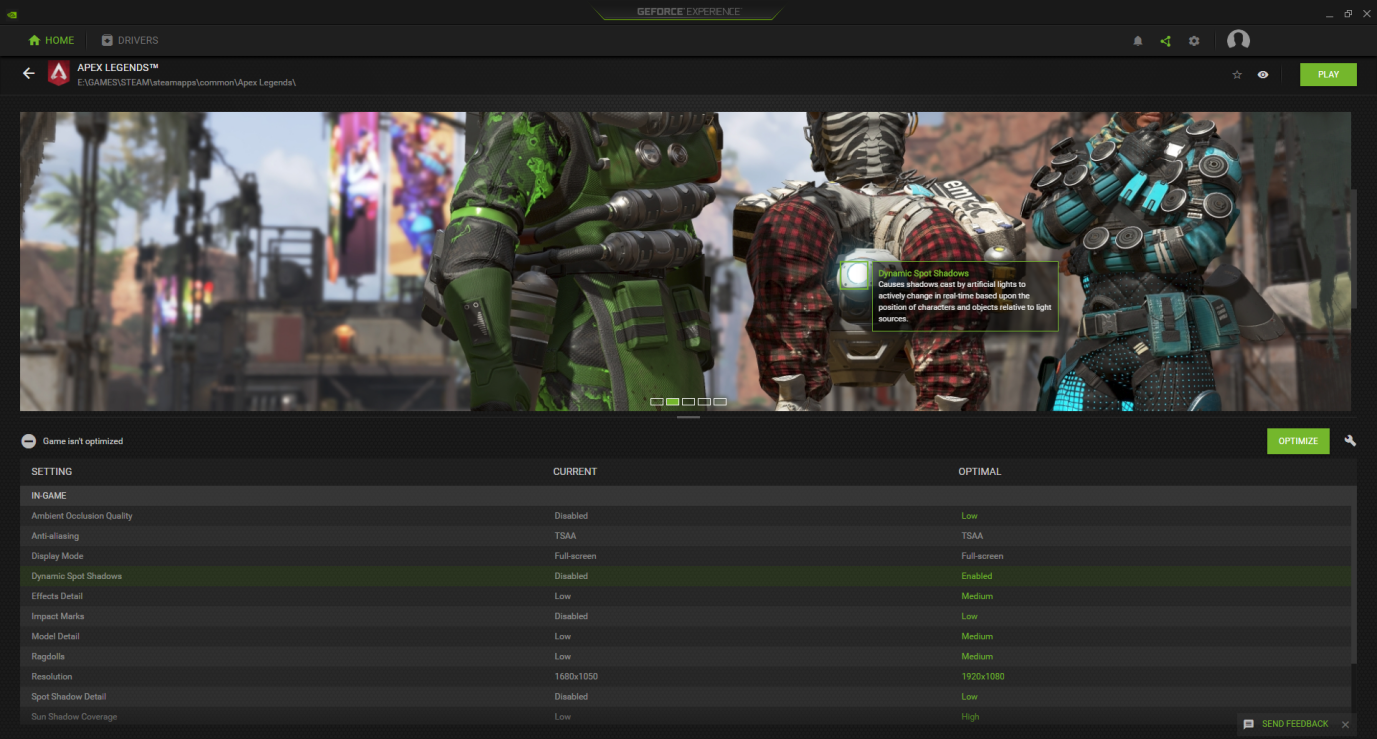
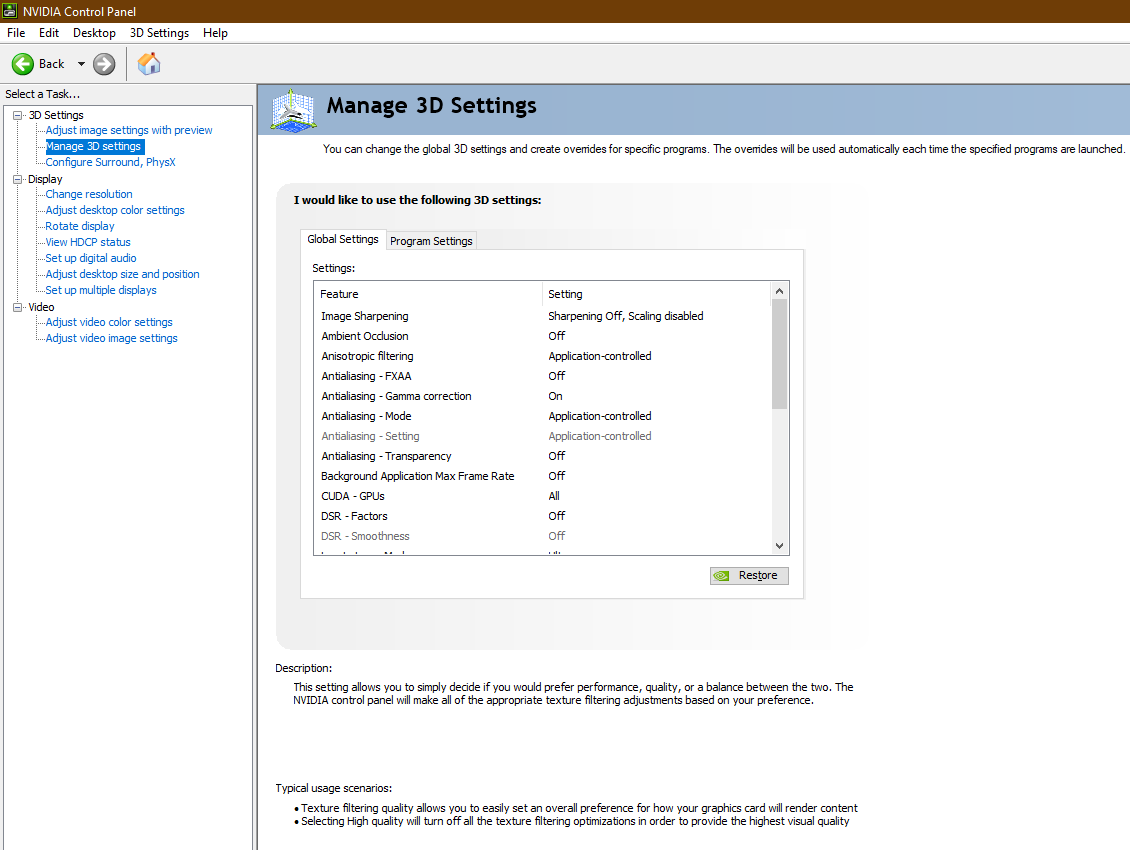
Every GPU is managed using a dedicated control panel and you can use the Nvidia Control Panel to improve visual quality and maintain 60fps throughout the game. Open “GeForce Experience” and choose Apex Legends.
Players have the “optimize” button located in the middle right corner and click to choose the “optimize” setting for Apex Legends. Open “Nvidia Control Panel” and click on “Manage 3D Settings” to modify the settings.
Choose Power – Maximum ModeChoose Low Latency – UltraChoose Texture Filtration – Prefer Maximum
Change three settings that I have mentioned above to bring the maximum power of the GPU to the table. You can always click on the “Restore Defaults” button located at the top right corner to go back to the previous setting.
How to Improve Apex Legends Picture Quality in AMD Radeon Software?
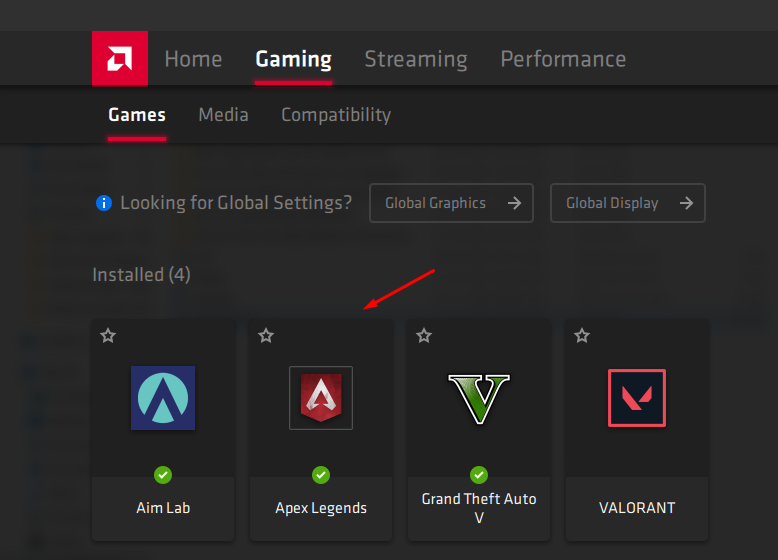
AMD updated the Radeon Software and it has a new interface & a new set of functions that are impressive and complicated for new users at the same time. Allow the expert hands to show you the way to improve visual clarity with minimal GPU load. Step 1: Press Windows Key + S and open “AMD Radeon Software”. Step 2: Click on “Gaming” located in the main top menu.
Step 3: Choose “Apex Legends” from the scanned game list.
Step 4: You can make advanced changes for Apex Legends here.
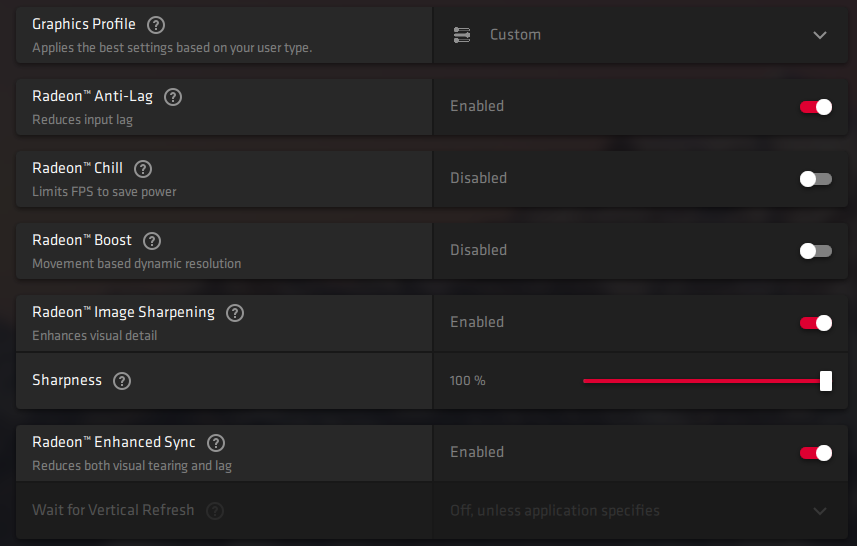
Step 5: Take a look at the graphics profile and copy the setting.
Enable Radeon Anti-lagEnable Radeon image-sharpening and choose the sharpness from 60% – 100%, if your GPU can take on the load.Enable Enhanced Sync, if your GPU can handle the load.
Remember, I have tried all these settings in competitive games and the GPU did not throttle during an intense battle. Overall, I am confident that this setting will improve the overall visual quality and won’t impact the GPU negatively.
Bottom Line
Now, you can fix Apex Legends blurry picture quality on Windows PC and it doesn’t matter if you have Nvidia or AMD GPU. Console players have no choice but to turn down the settings to meet the performance expectations and it is one of the major flaws of Xbox & Play Station. Let us know which solution helped you to solve blurry video quality in Apex Legends in the comment section below. If you’ve any thoughts on Apex Legends – How to fix Blurry or Blurring?, then feel free to drop in below comment box. Also, please subscribe to our DigitBin YouTube channel for videos tutorials. Cheers!
Instagram Video Selfie Verification Error [Fixed] Fix Gmail App not working on Android Issue [5+Methods] How to Fix Bluetooth Missing From Device Manager in Windows 11?
Comment * Name * Email *
